Python in Jupyter: Difference between revisions
From CommunityData
No edit summary |
No edit summary |
||
| Line 6: | Line 6: | ||
* Open the notebook in jupyter tab in browser. | * Open the notebook in jupyter tab in browser. | ||
* Notebook itself should encourage them to run some cells. | * Notebook itself should encourage them to run some cells. | ||
* Terminal navigation instructions below should be updated to work for MacOS and Windows | |||
| Line 14: | Line 15: | ||
# Find the "VSCode" application in the Anaconda Navigator window. If it is not yet installed, click "Install" (this may take a few minutes) | # Find the "VSCode" application in the Anaconda Navigator window. If it is not yet installed, click "Install" (this may take a few minutes) | ||
# Launch the VSCode text editor. | # Launch the VSCode text editor. | ||
===Write and save a short Python script=== | ===Write and save a short Python script=== | ||
# Click "New file" to start a new, blank text file. | |||
# Add the following line to your new text file: | # Add the following line to your new text file: | ||
Revision as of 01:53, 15 January 2020
We are going to practice writing and running Python programs (often called "scripts").
TODO:
- Download a sample notebook
- Make sure the notebook is in your desktop (this keeps things simple)
- Open the notebook in jupyter tab in browser.
- Notebook itself should encourage them to run some cells.
- Terminal navigation instructions below should be updated to work for MacOS and Windows
Download and start your text editor
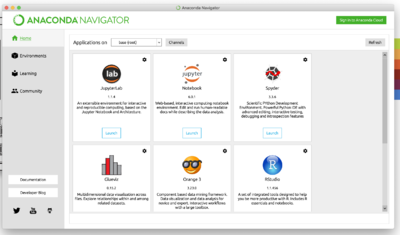
- Launch Anaconda Navigator
- Find the "VSCode" application in the Anaconda Navigator window. If it is not yet installed, click "Install" (this may take a few minutes)
- Launch the VSCode text editor.
Write and save a short Python script
- Click "New file" to start a new, blank text file.
- Add the following line to your new text file:
print("Hello World!")
- Save the script as
hello.pyin your Desktop directory. The.pyextension indicates that this file contains Python code.
Run the script
- Start a new terminal prompt. See the terminal navigation on Windows or terminal navigation on Mac instructions for the steps to do this. Recall that on Windows a terminal prompt will look like
C:\and a Python prompt will look like>>>. Make sure you are at a terminal prompt and not a Python prompt; if you are at a Python prompt, you can typeexit()on a line by itself and then press enter to exit Python and return to a terminal prompt. - Navigate to your Desktop directory from a PowerShell terminal prompt, using the
lsandcdcommands. See the terminal navigation on Windows instructions for a refresher on using these commands. Don't hesitate to get help from a mentor on this step if you need it -- it's a new way of navigating around your computer, so it may be unintuitive at first! - Once you are in your Desktop directory, you'll see
hello.pyin the output ofls. - Type
python hello.py
and press enter. Doing this will cause Python to execute the contents of that script -- it should print "Hello World!" to the screen. What you've done here is run the Python application with an argument -- the name of a file, in this case "hello.py". Python knows that when you give it a file name as an argument, it should execute the contents of the provided file. You get the same result as if you typed
print("Hello World!")
at a Python prompt and press enter.
Success
You created and ran your first Python script!
- When you run the
pythoncommand by itself, you start a Python prompt. You can execute Python code interactively at that prompt. - When you run the
pythoncommand with a file name as an argument, Python executes the Python code in that file.


